How to Collect Rain Water
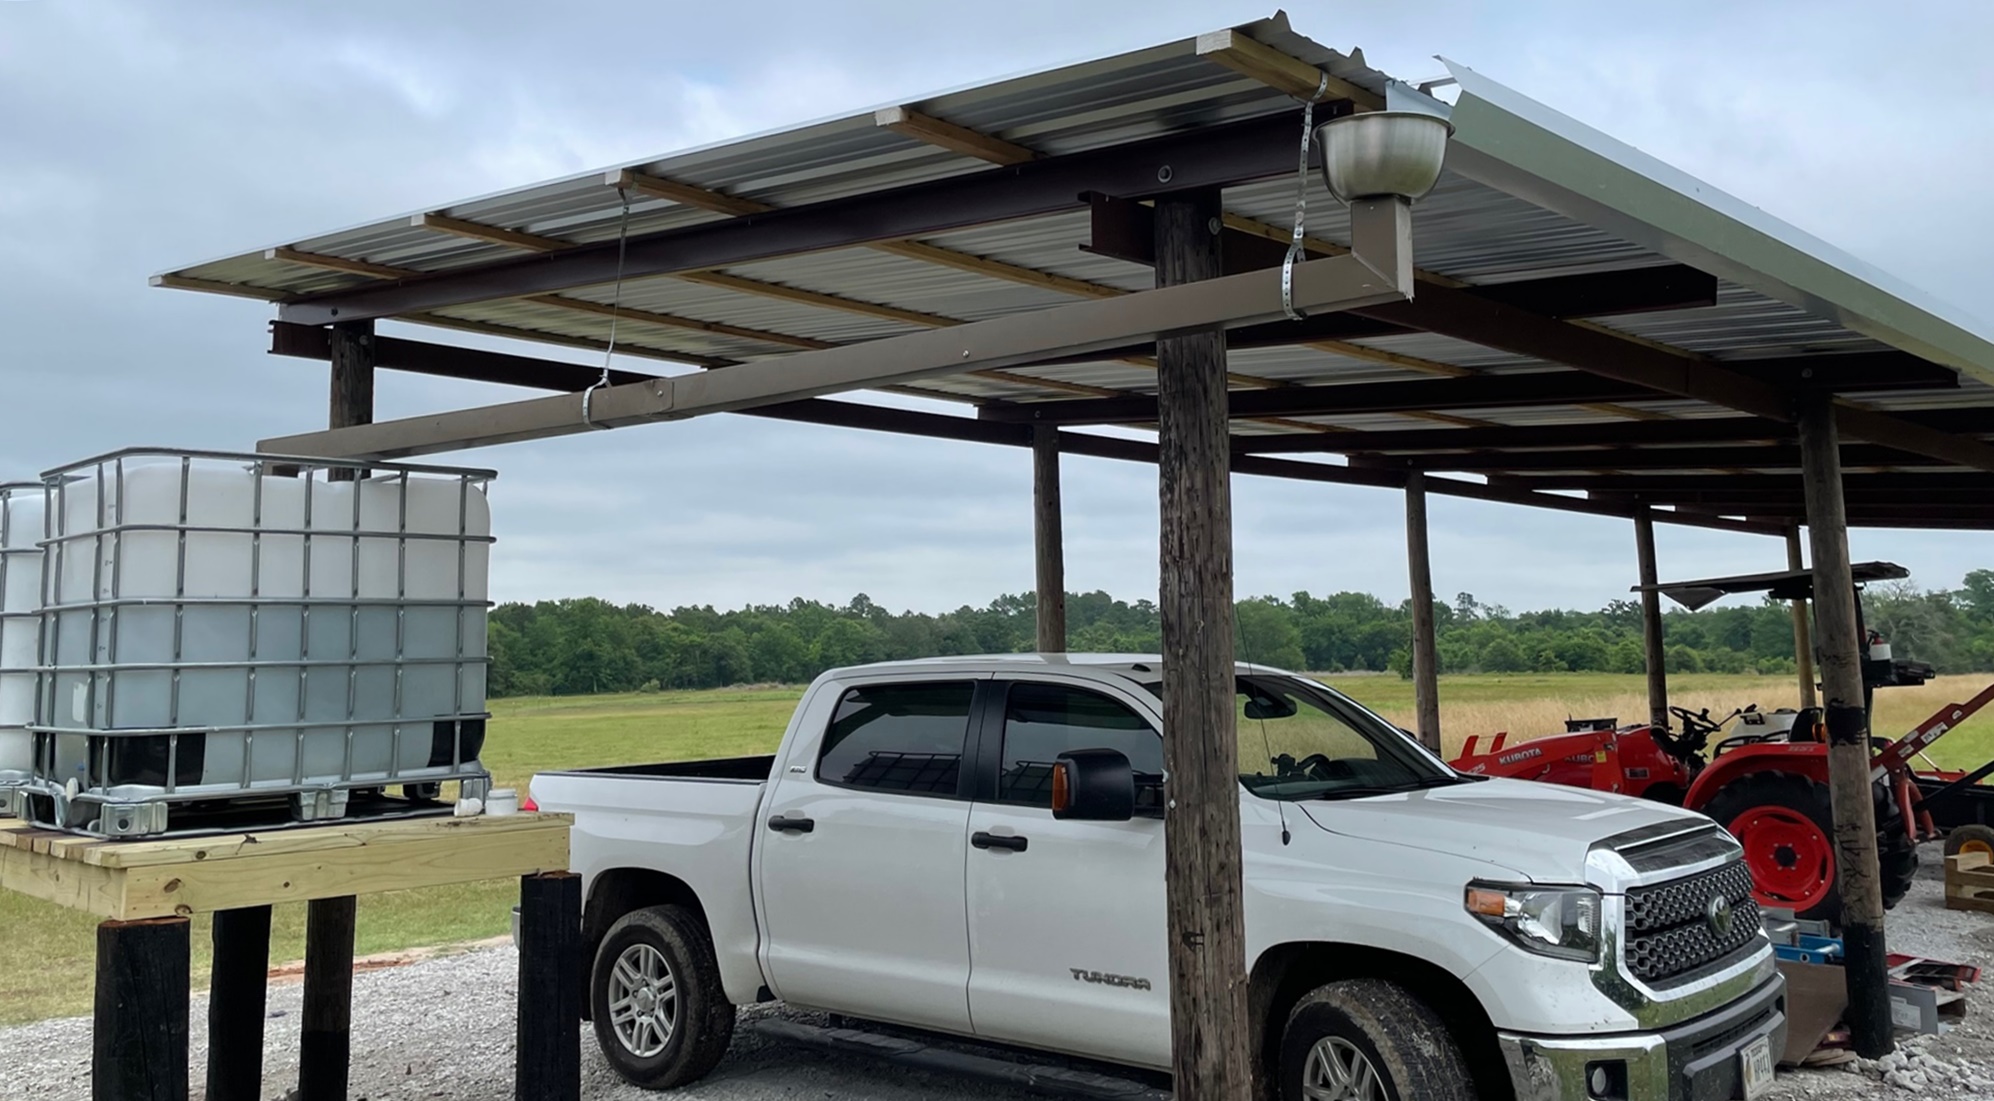
Maybe a better question is why would you want to collect rain water? If you have access to an existing water supply, the answer is you probably don't. It takes time and money to install a system like this, and involves a fair amount of maintenance to keep it working. Water from the county is less than 1/2 cents per gallon, is under pressure and clean.Frog Bottom Preserve does not have a water source clean enough to use for spraying, so decided to install a rainwater collection system. The spray system I use sprays about 25 gallons per acre. I'm currently spraying 5 acres to convert to native grass, and 15 acres for hay. So I need around 20 acrea X 25 gallons = 500 gallons when I spray. In addition, rain in this part of Texas can be very inconsistent, especially June through October, so need water for tree watering. I installed two 275 gallon tanks on an elevated platform next to my equipment storage shed to collect water off the roof. While there are two large ponds water can be taken from, that water tends to plug filters due to algae and small bugs. And it's a pain to use 5 gallon buckets to fill a 60 gallon sprayer!
I installed a 30 foot long gutter on the back of the shed to catch rainwater. Doing some math:
(1 inch rain / 12 inch per 1 foot) X 20 feet long roof panel X 30 foot long gutter X 7.48 gallons per cubic foot = 374 gallons per 1 inch of rain! I'm in the water business!
While we're doing math, how much does 500 gallons weigh? 500 gallons X 8.33 Pounds per gallon = 4,165 pounds - TWO TONS! Since I want to have the tanks elevated, I'll need to install a pretty robust stand.
Tanks are full with 500 gallons of water!
Whats the Plan?
It helps to start by drawing things out.Lots of good reasons to start with a plan. Helps to determine what parts you need. And it makes you think through details, like amount of storage, how to connect to gutter system, how is a gutter installed on a metal roof, etc etc.
Regarding costs, need the following parts:
- Gutter, for back of the shed
- Stand, to get tanks elevated
- Tanks, to hold water
- Piping and downspouts, to control flow and access water
The rest of this site discusses how I put all this together.
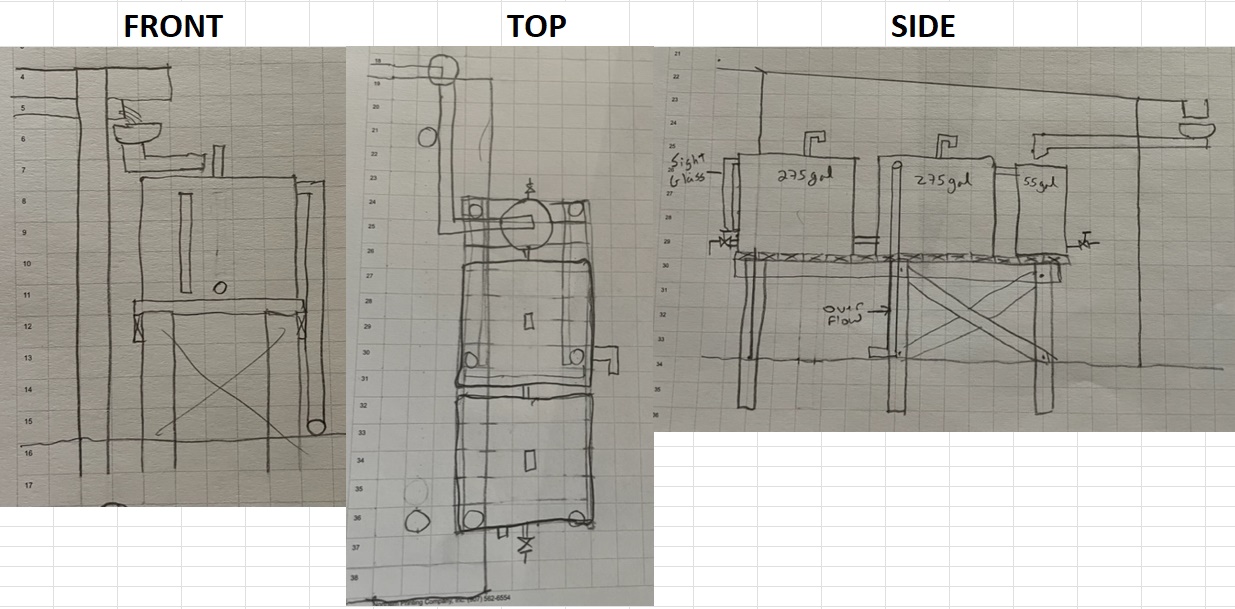
It all starts with drawing it out on paper.
Building a stand
The tanks need to be elevated. I want to be able to pull my sprayers under the outlet and fill them without using a pump - I don't have power and don't want to rig up a 12 volt pump. My highest sprayer inlet is 50 inches off the ground, so the tanks need to be at least that high.So using the post hole digger on my tractor, dug four 30 inch deep, 12 inch diameter holes, four and eight foot apart. The ground is hard clay. With over 1/3rd the total pole length burried in this hard material I'm not worried about the posts getting pushed over so did not add any laterial bracing. Cut four used telephone poles to 80 inches, coated them with roofing tar and put in hole. Backfilled the holes with the clay and tamped solid. Used a straight 2x4 and level to cut the tops of the posts level on the same plane. Used a treated 4x6x8 foot post to span the long distance, a 2x6x4 foot to cap the ends. Pre-drilled the ends of the 4x6 and installed a 1/2 inch x 8 inch long lag screw. Decked the top of this box with some 2x6 and 2x8 scraps I had laying around.
I'm not happy with how the lengths worked out. The 8 foot long 4x6 runners are not fully on the post ends. If I had to redo it, I'd put the posts at 6 foot spacing. That would reduce the unsupported span length.
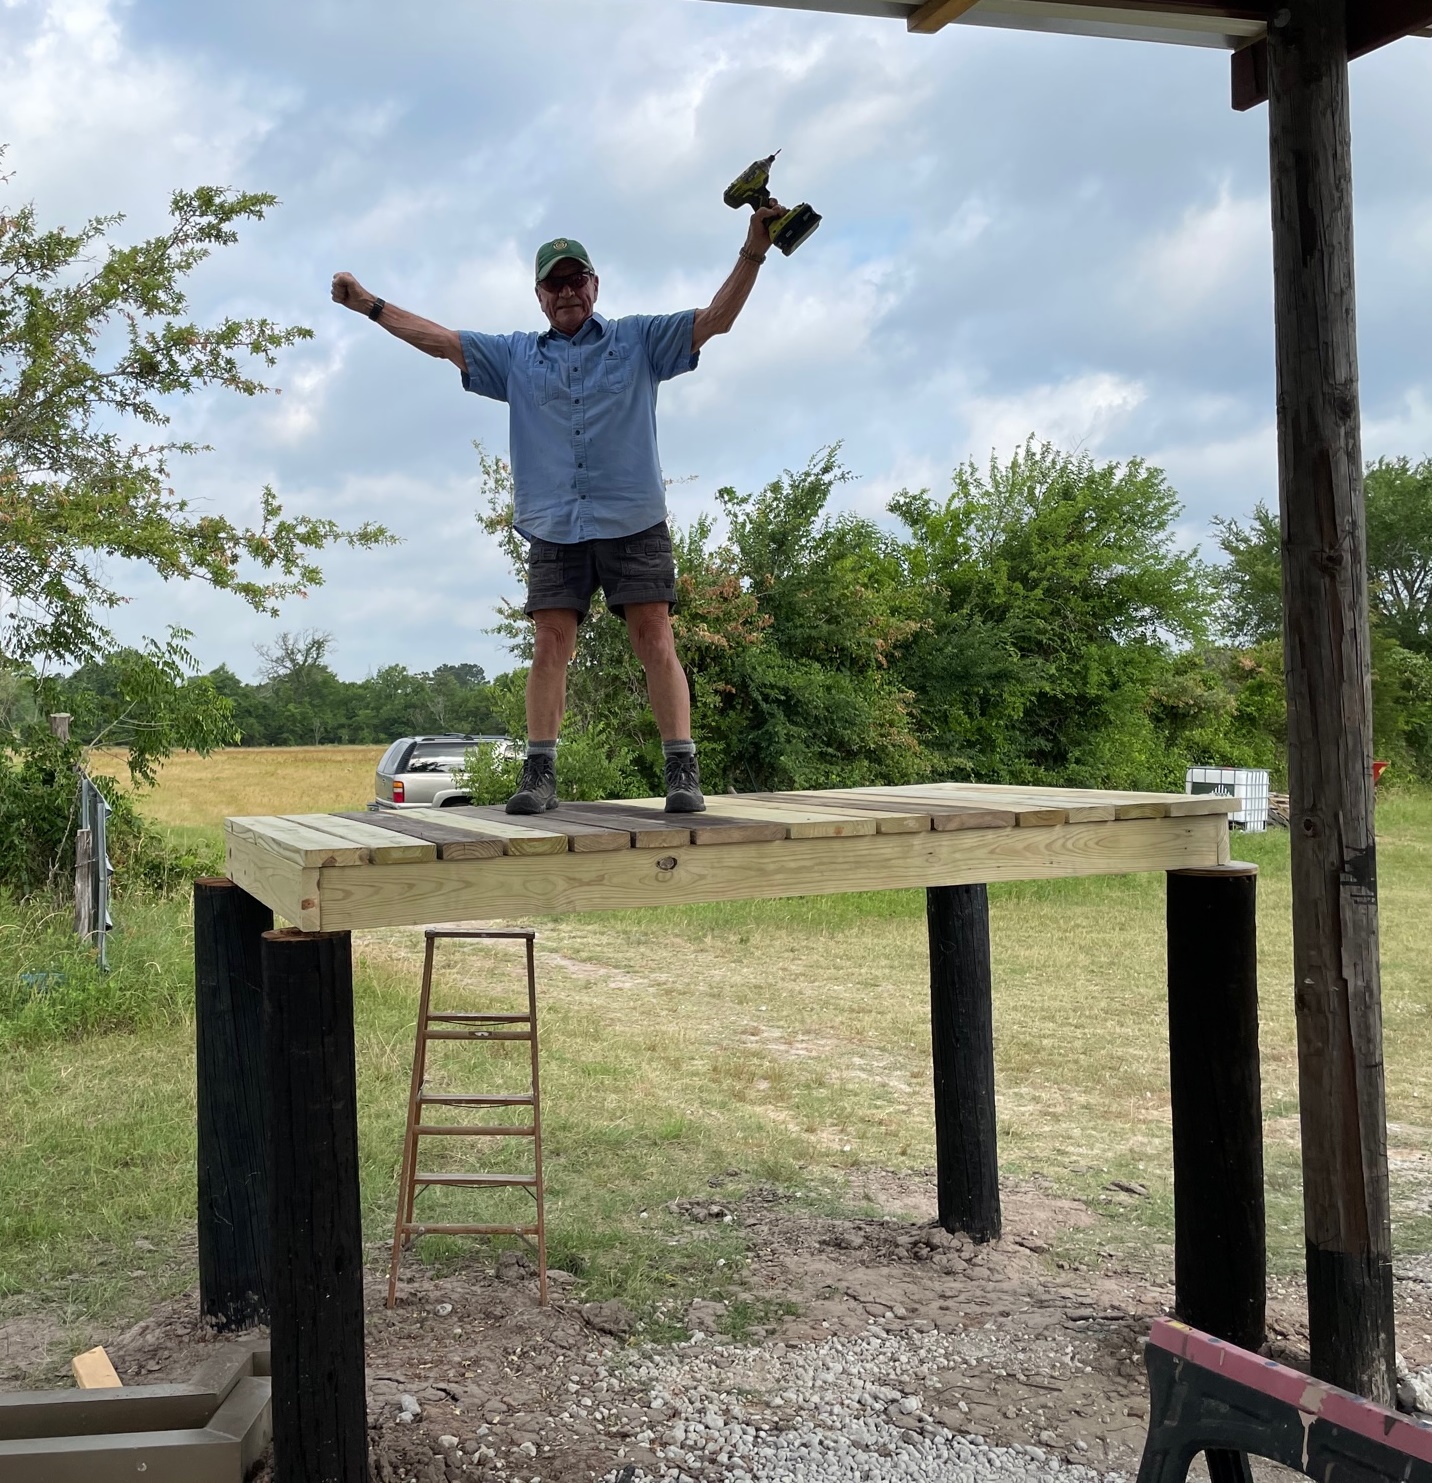
There are four 8 inch diameter telephone poles set 30 inches into the ground. 4x6x8 foot treated timbers are placed across the top of the poles and a lag screw holds them in place. The top is decked with 2x6 and 2x8 boards screwed to the 4x6s. My friend is doing a load test - he weighs 1/20th the weight of the water!
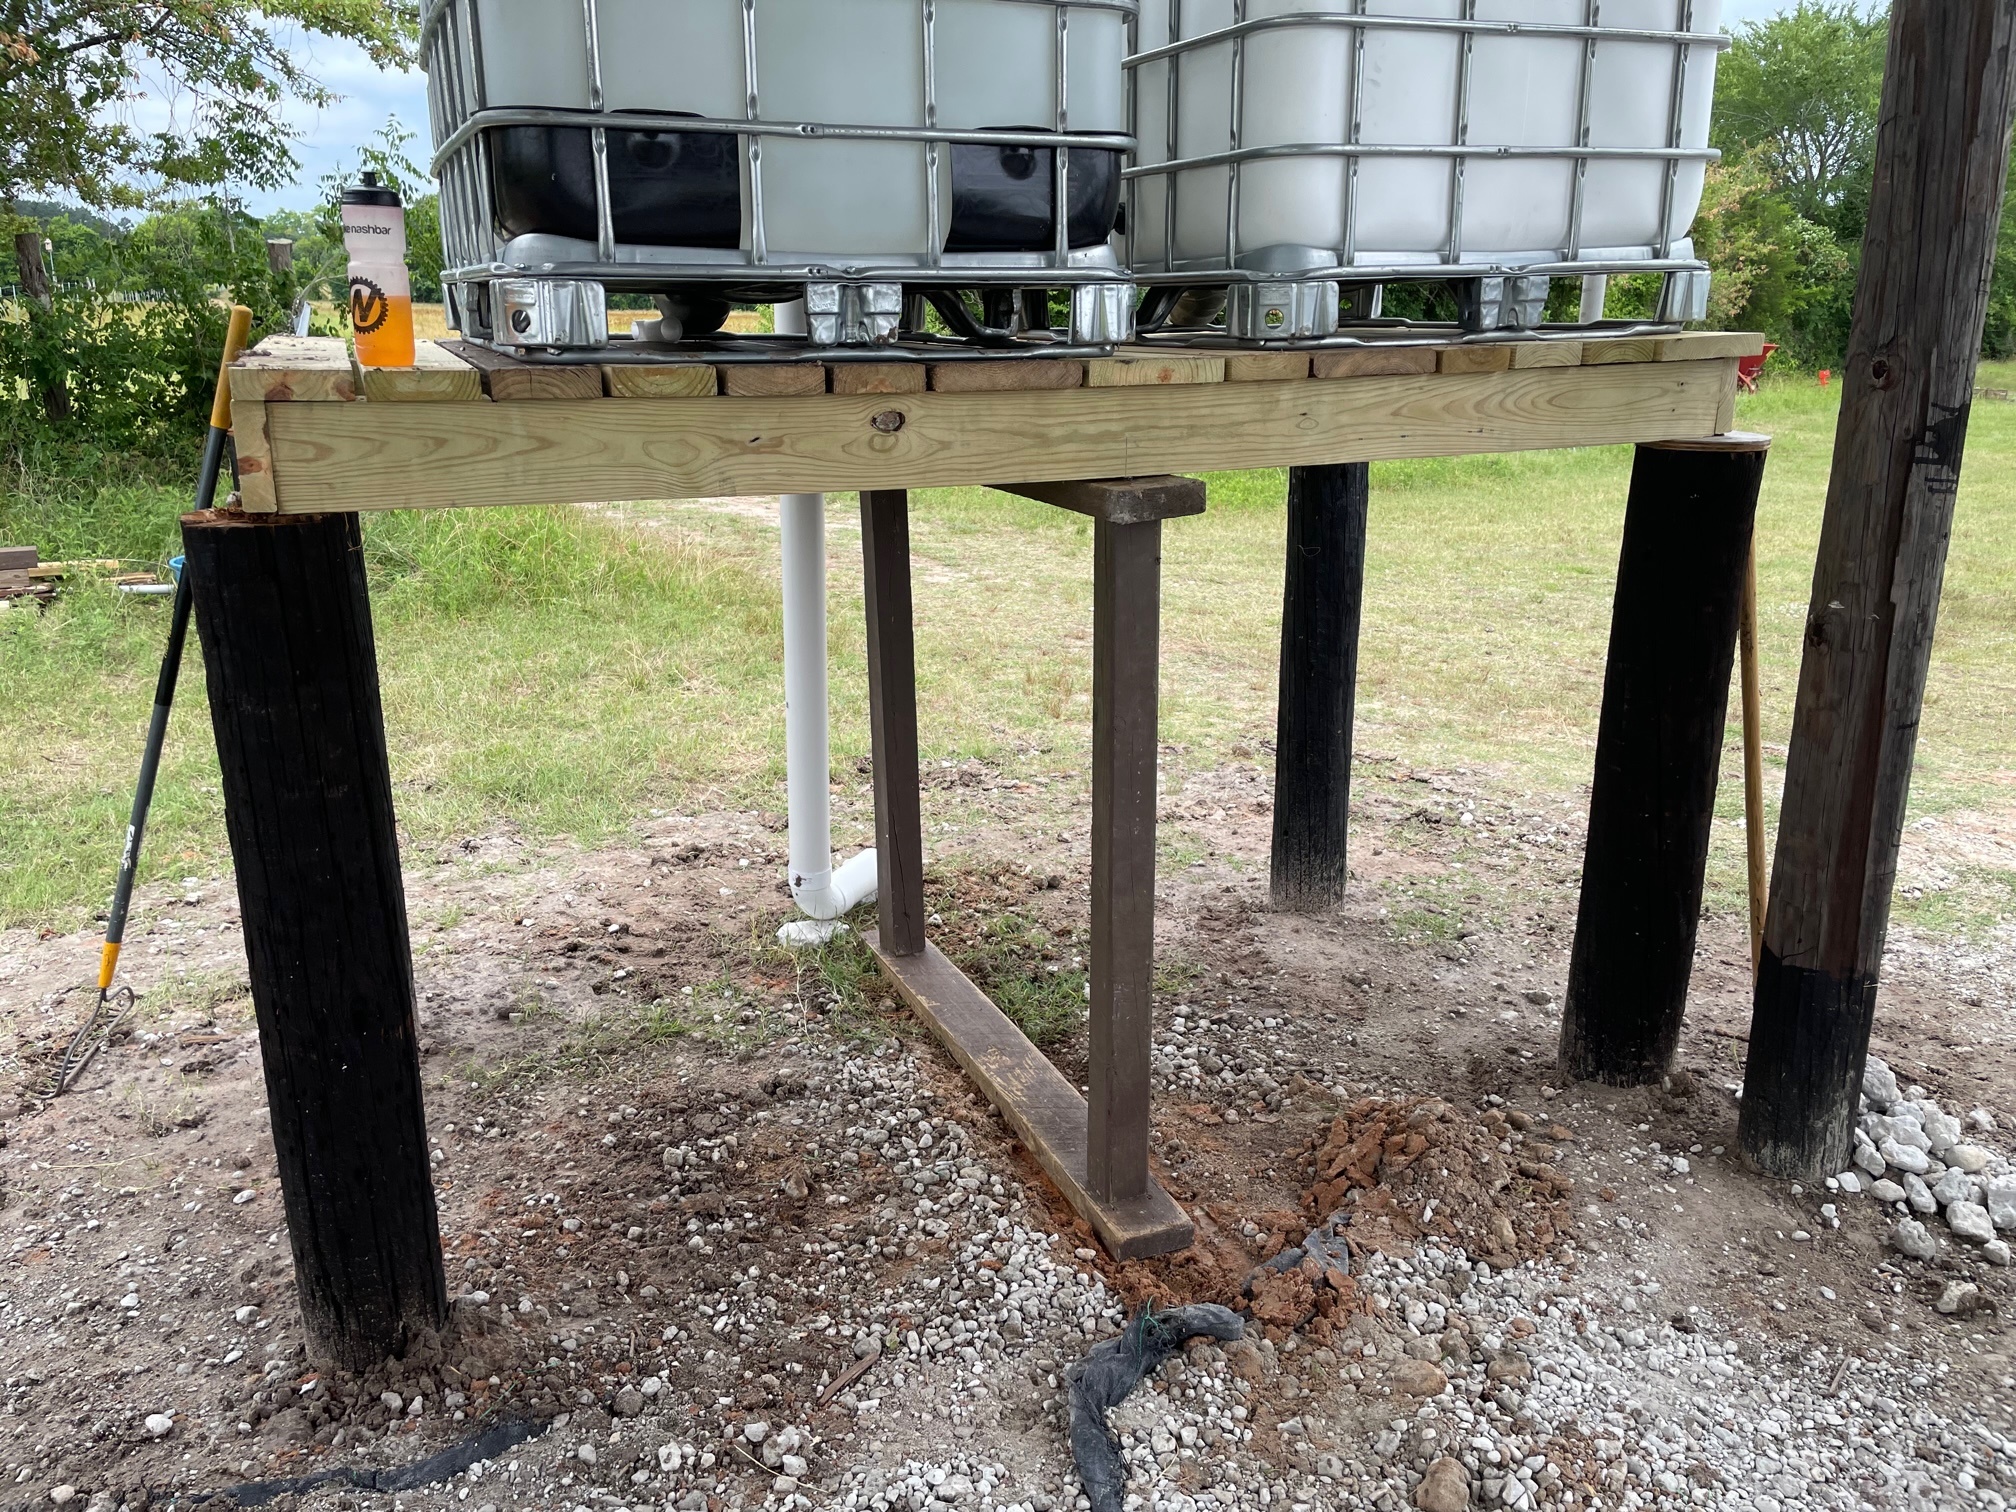
Temporary center brace added due to bowing.
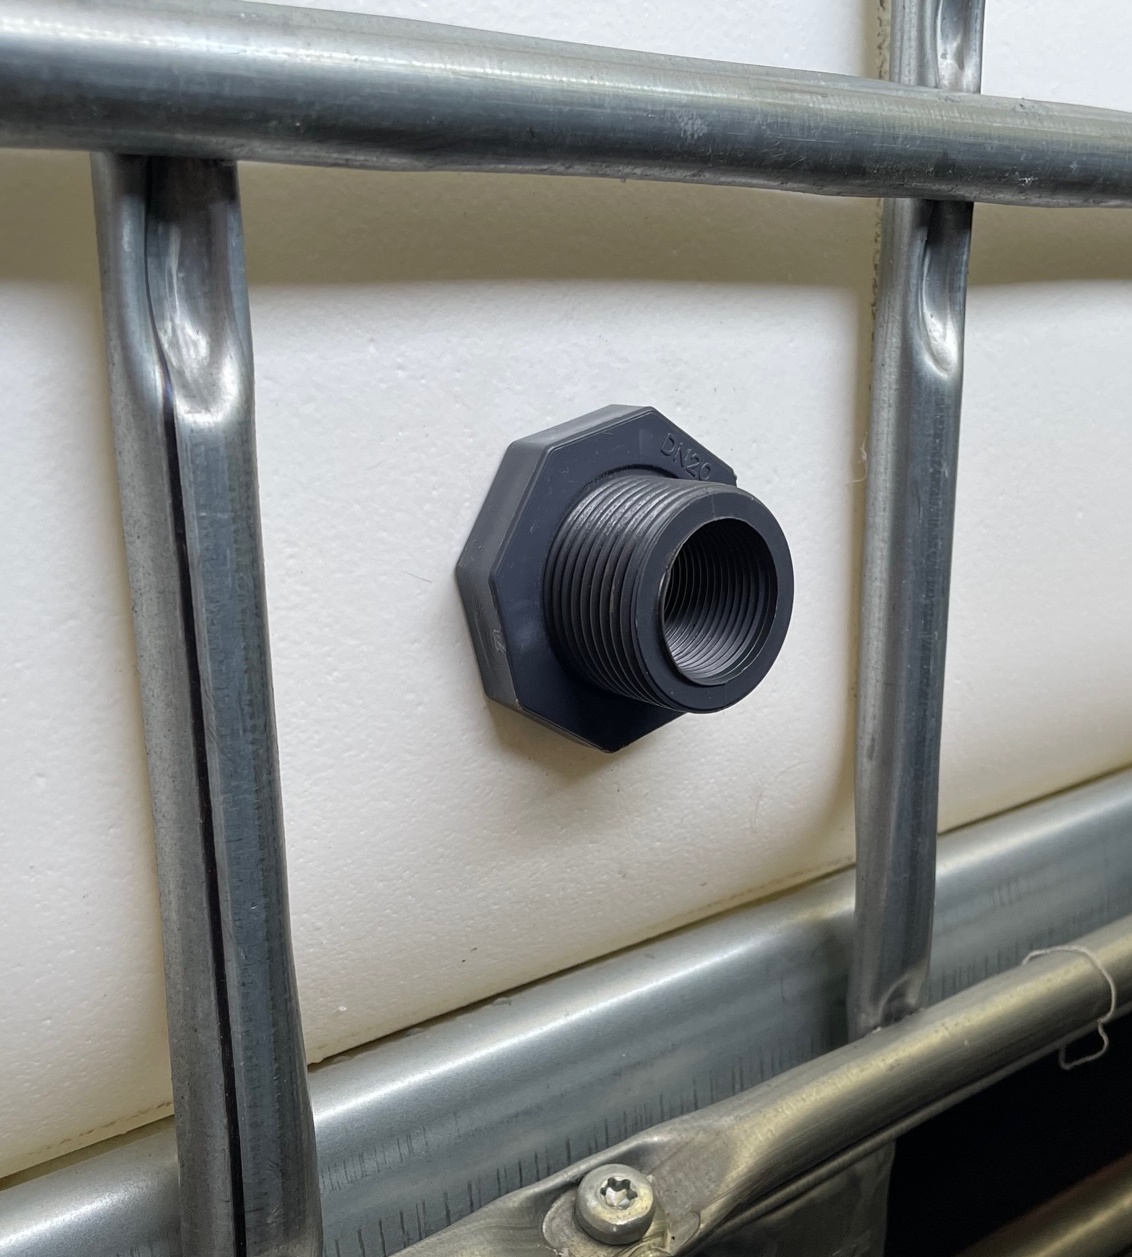
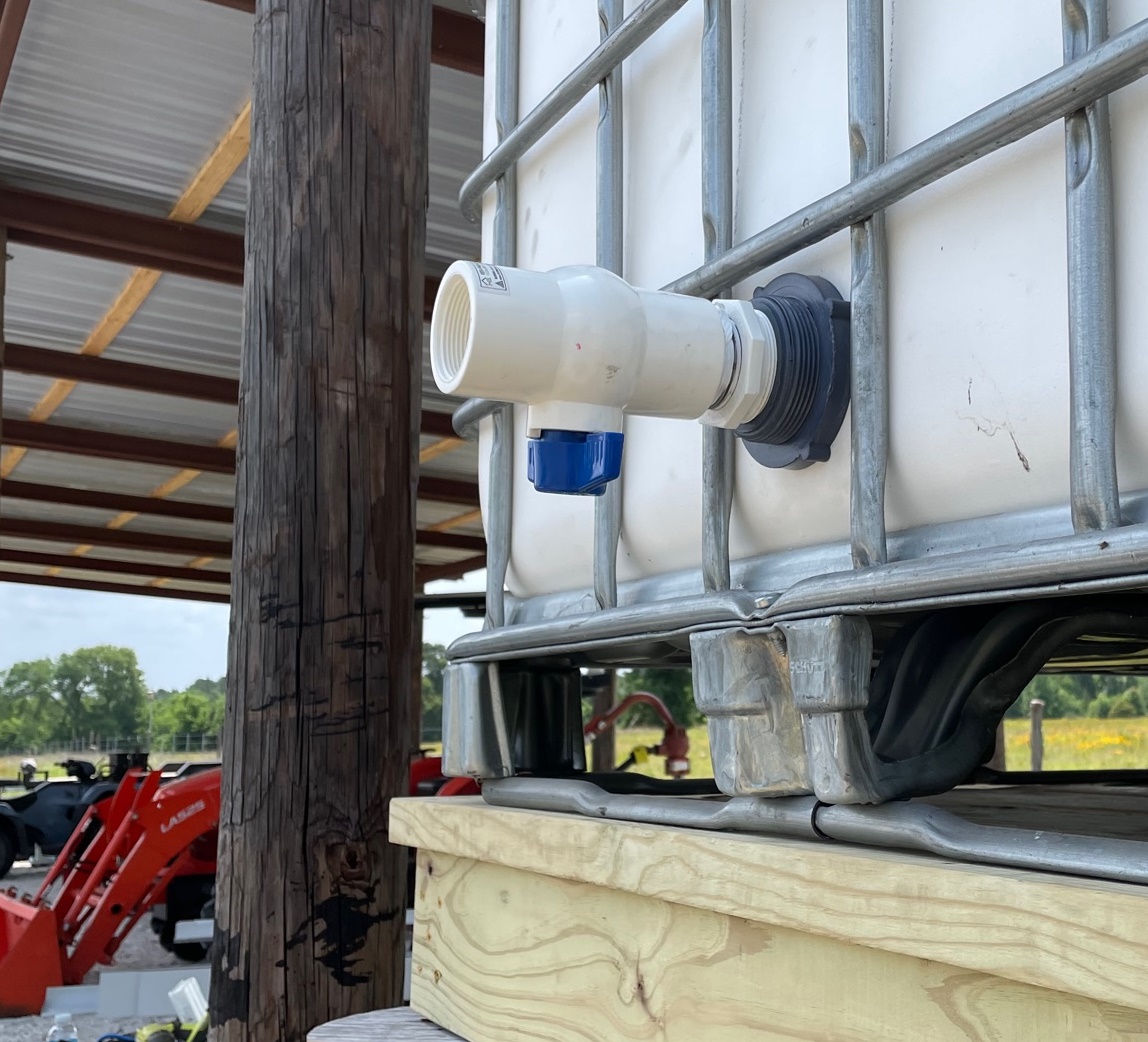
Installing Bulkhead Fittings
You will need to add several water tight penetrations through the tank walls. This is needed for both the water outlet and the pipe that connects the tanks to allow water to equalize between them. What you need to use is a "Bulkhead Fitting". They are designed to provide a watertight connection.Here is a link to an example on Amazon (note I don't get any referral fees, this is just for your convienence): https://www.amazon.com/dp/B07XRGNXWL?ref=ppx_yo2ov_dt_b_product_details&th=1
Don't drill a hole and try to screw a hose bib into it. The tank wall is thin and the connection will leak. And don't try to rig up some sort of gasket and PVC pipe connection - it will leak too. Just buy a couple of bulkhead connectors - this is the application they are made for. They are only about $10.
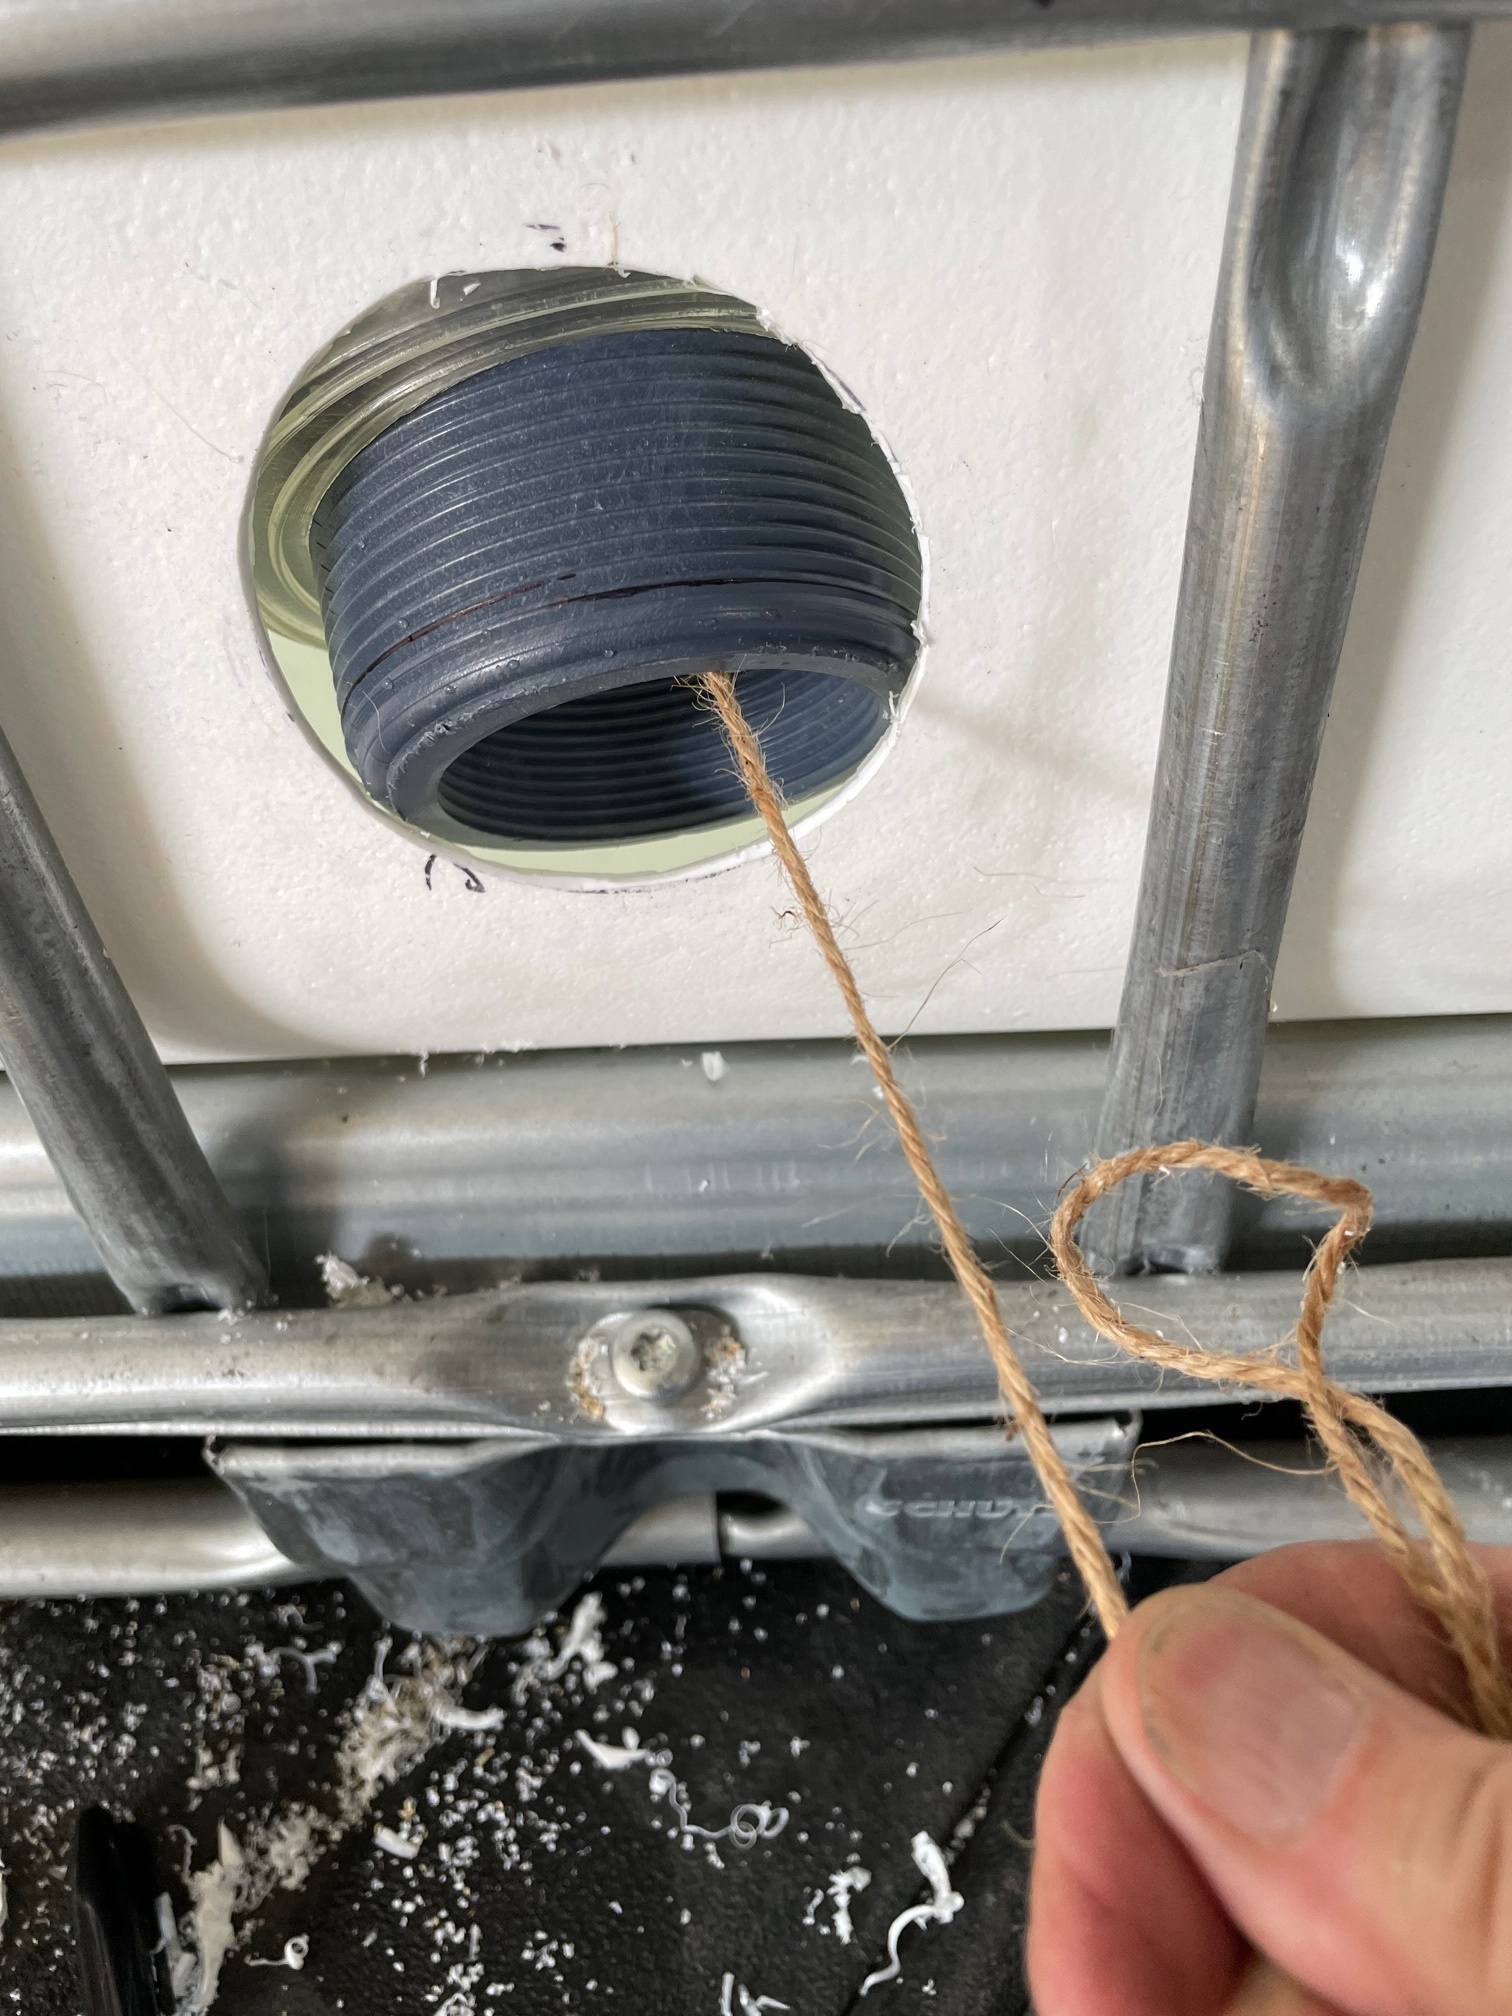
There is a trick to installing them - run a string from the desired location to the tank inlet. Then thread the inside part of the bulkhead fitting and let the string guide it to the desired location. Works great.
The lock nut threads are left-handed (backwards). This is helpful - the threads in the bore of the fitting are conventional NPT, so you can use a piece of pipe to hold the inside bulkhead part in place while you tighten the nut.
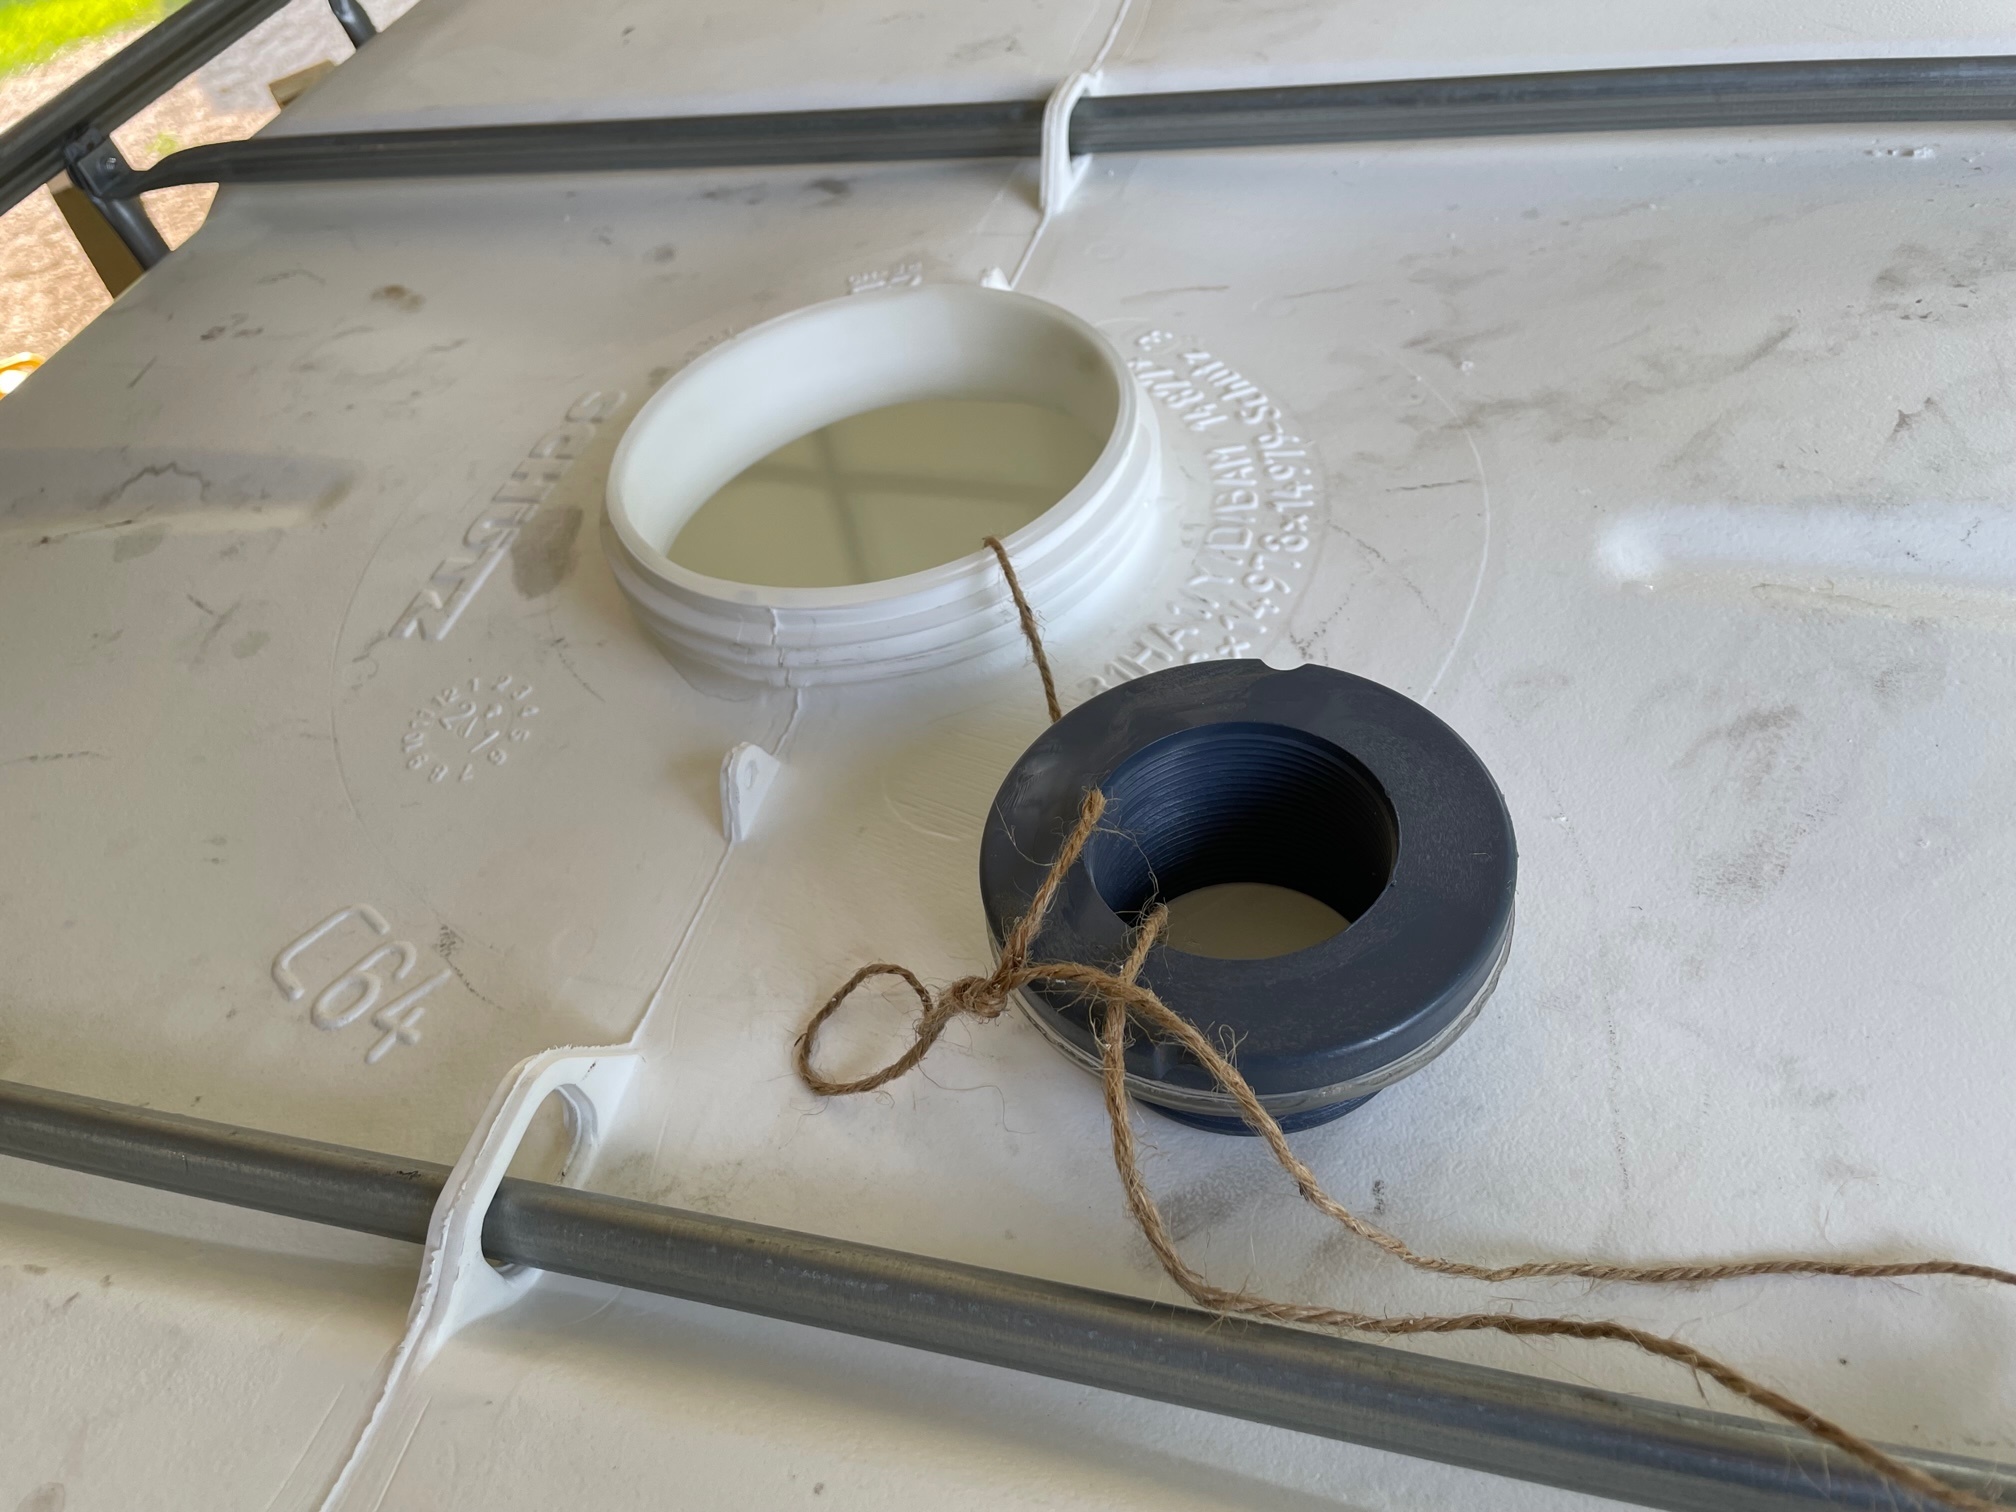
Start by drilling a hole in your tank where you want the new outlet. I used a 2 inch bulkhead fitting - it needs a three inch hole. Then thread a piece of string from the new hole to a tank opening, Put the thread through the male portion of the bulkhead fitting with the threaded side towards the hole.
Connect the tanks
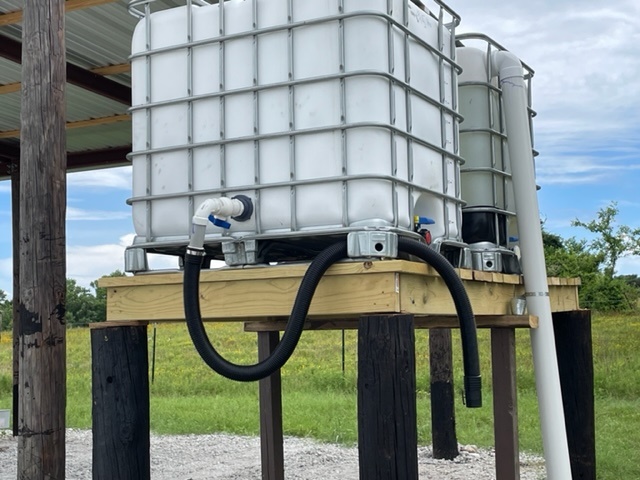
I wanted 500 gallons of storage capacity. There is a guy near my house that sells used drums and 275 gallon tanks. So I bought two of the tanks for $90 each, rinsed them out really well, and sat them on the elevated platform.The plan is for water from the roof to flow into the first tank, then equalize into the second tank. That helps keep dirt, leaves, insects, etc in the one tank. Plan in the future is to add a third catchment tank in front of these two to help minimize chance of needing to clean them.
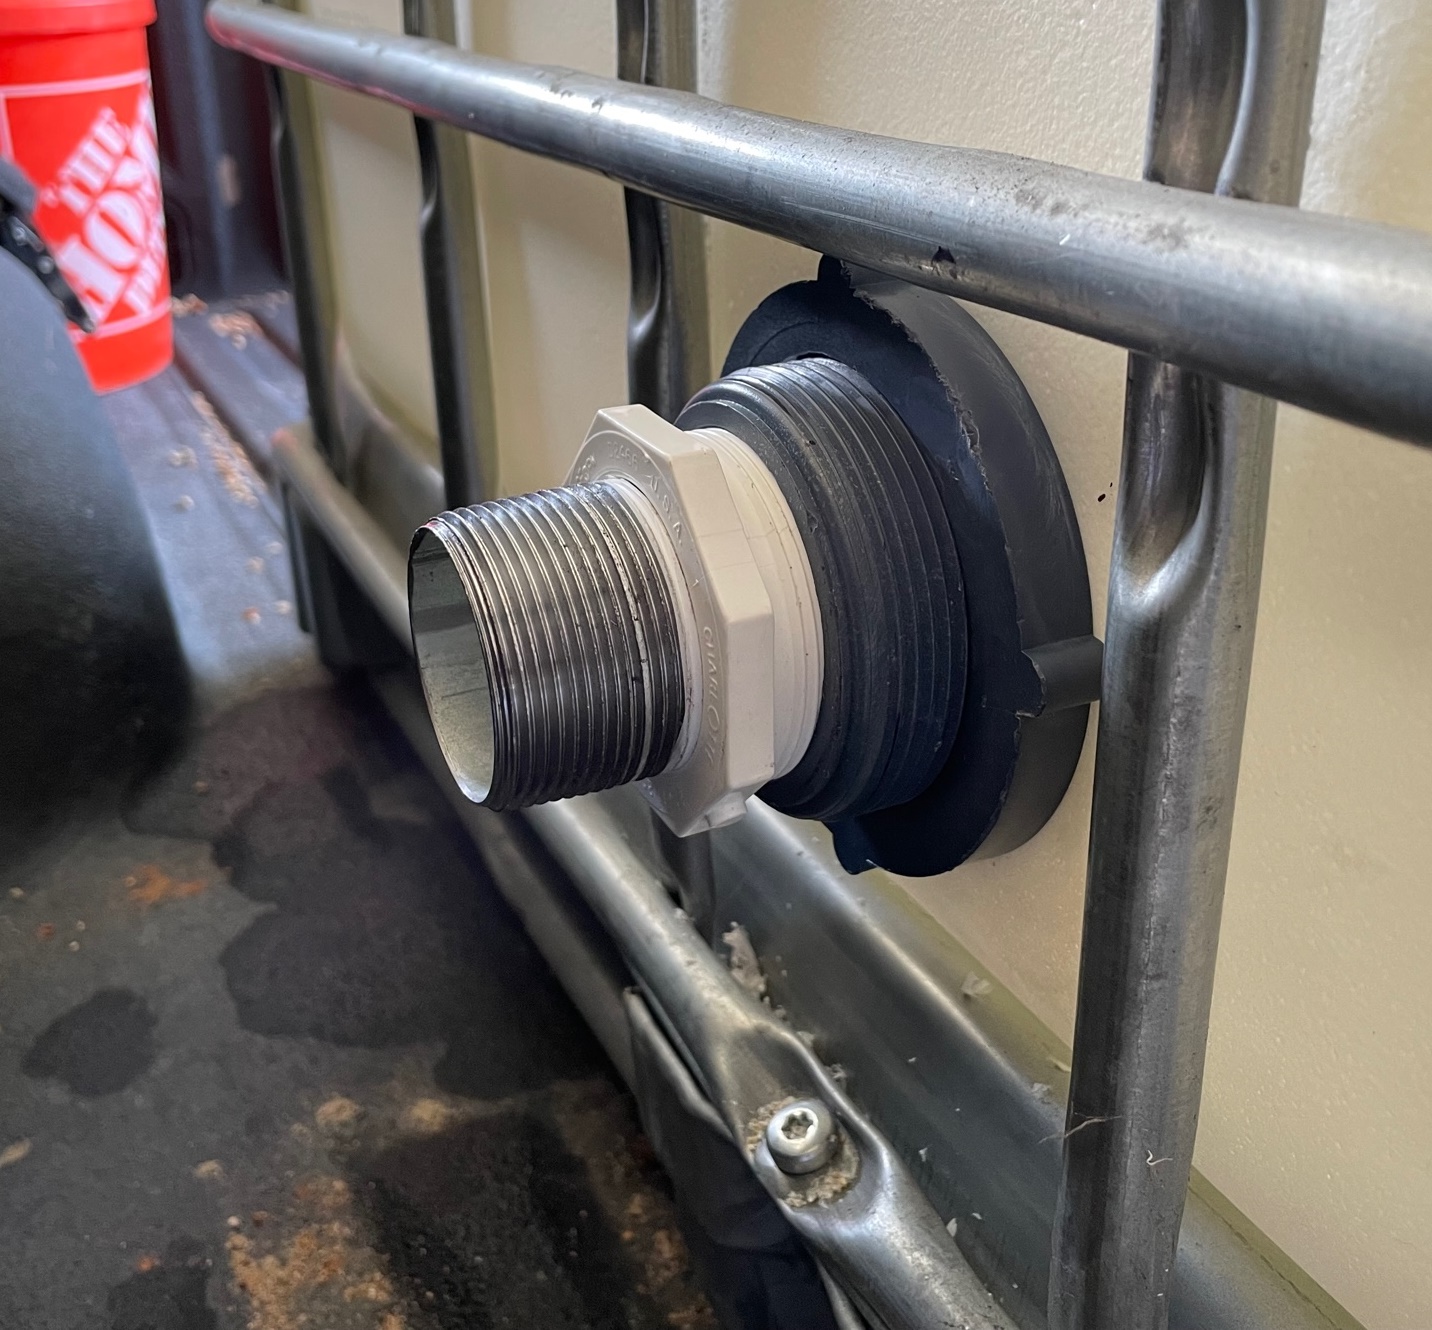
So I drilled holes towards the bottom in both tanks, aligned best I could. Installed 1 inch bulkhead fittings in both holes, installed 6 inch nipples, then used a compression coupling to join the two nipples.
You don't need a large diameter connector pipe between tanks. There is plenty of water in the one tank to quickly fill a sprayer. Larger means greater chance of leaking so I tried to keep it no bigger than needed. Just don't want the pipe to get plugged up.
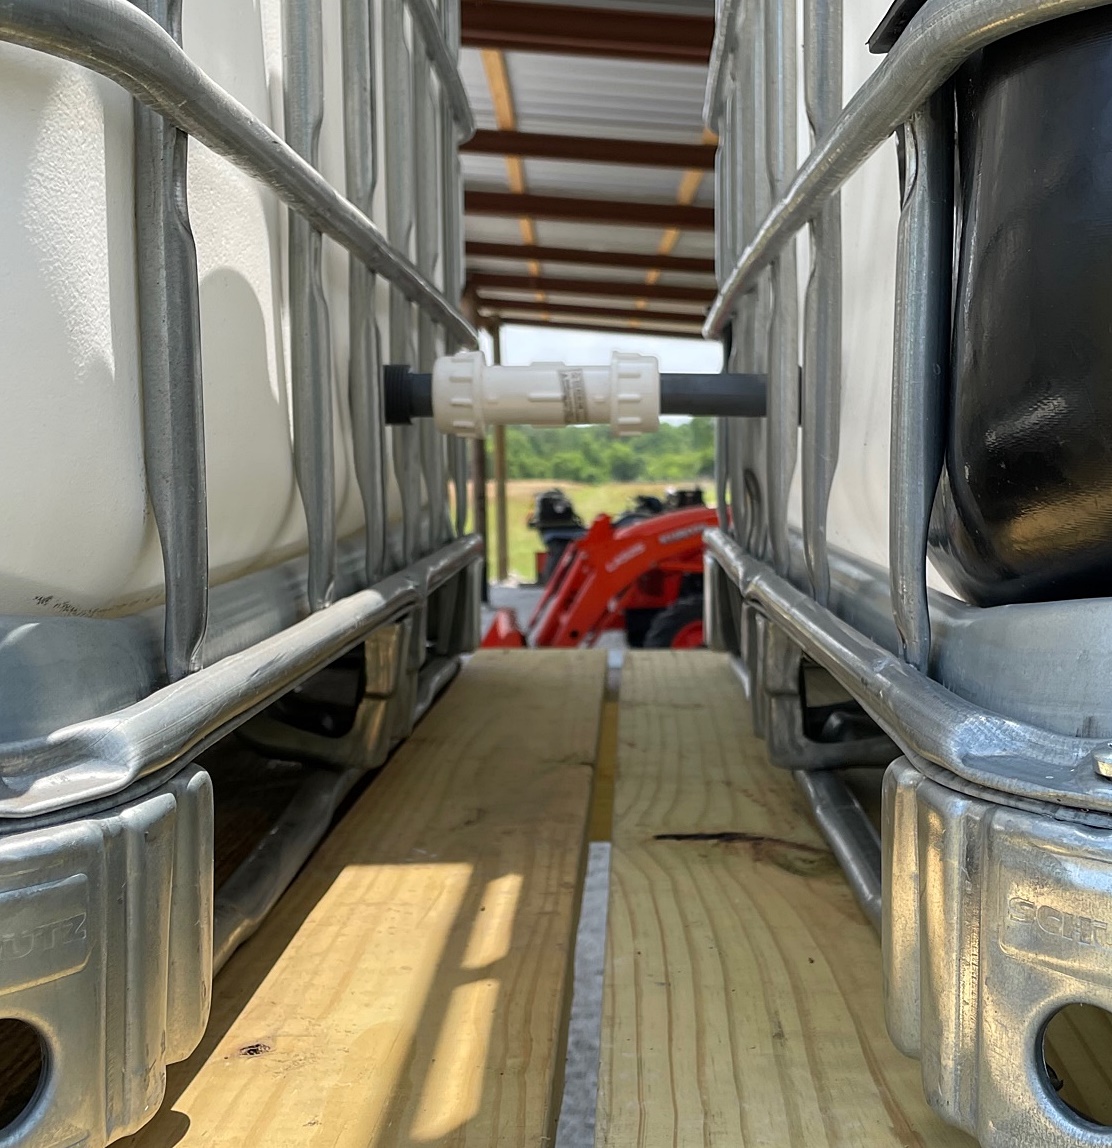
Compression coupling connects the two tanks to allow levels to equalize.
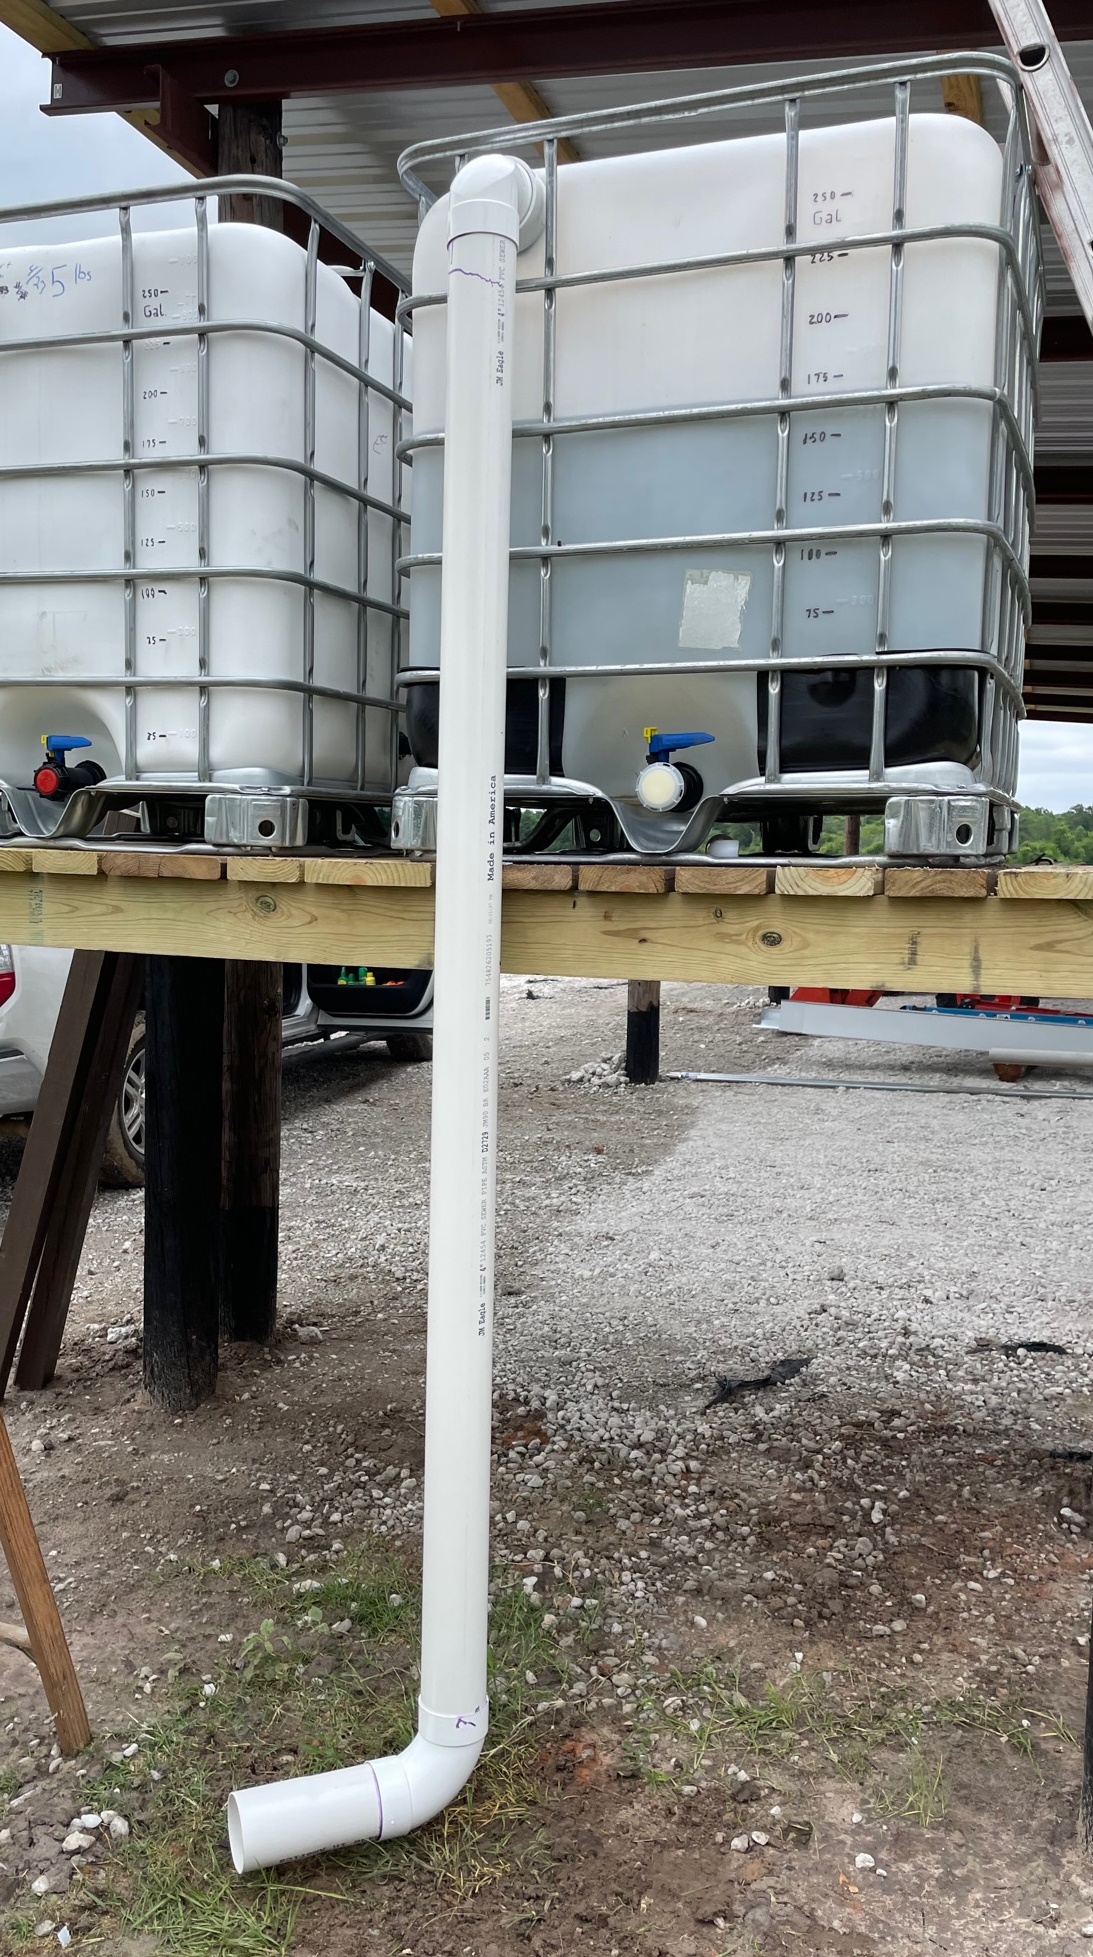
Overflow Piping
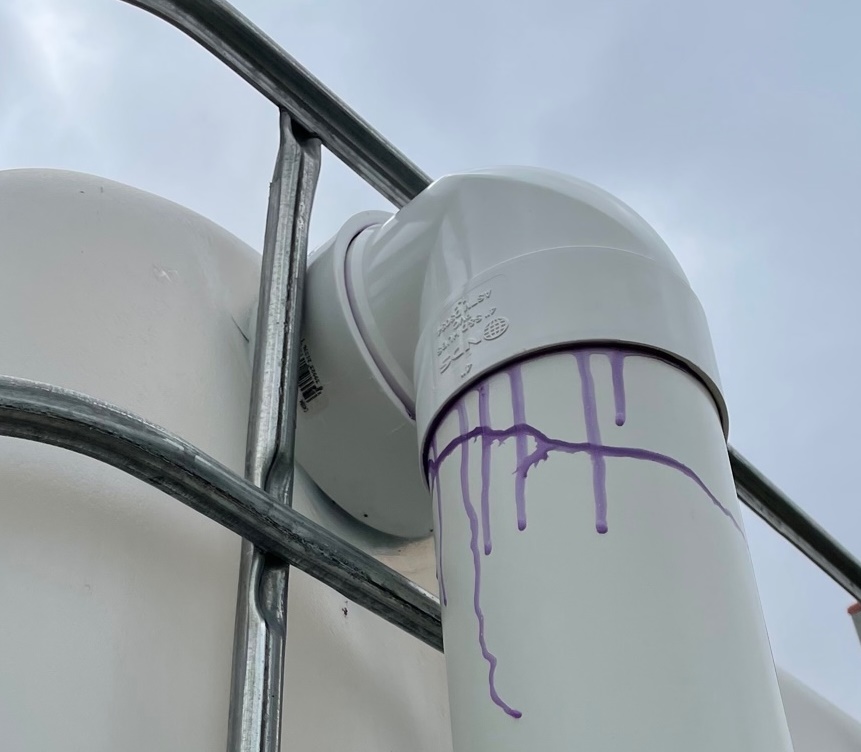
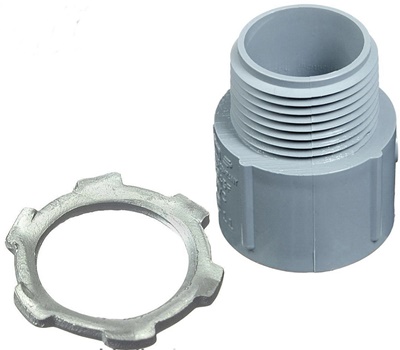
Once the tanks are full, if it is still raining, more water will continue to enter the tanks. If you don't have piping to handle this, water will flow out of the top ports on the tanks and run all over the stand then to the ground. Water falling from that height has quite a bit of force so will start to wash out the ground below the stand. So an overflow pipe is needed.Since there is no pressure acting on the connection (unlike the connections towards the bottom of the tank) you don't need as robust a seal. During large storms, we can get 3-4 inches of rain per hour - that's over 1000 gallons per hour to get rid of! So I used 4 inch piping. I cut a hole near the top of the tank and installed a 4 inch NPT male by 4 inch slip female PVC using a conduit locknut. It's not a perfect fit - the PVC threads are slightly tapered, but the locknut tightens well enough and holds things in place. Then I laid a thick bead of silicon all around the connection to minimize leaking.
For the downpipe, I used "sewer and drainpipe" rather than PVC pipe. It's about 1/3rd the cost of PVC and there is no pressure on it. The sewer elbow OD fit inside the 4 inch male adaptor perfectly.
Connect to the Gutter
Next is to connect the gutters to the tanks.There are a few points to consider. Gutters on metal roofs do not have any drop to them - they are attached directly to the roof panels. And I've had a lot of problems with gutters getting plugged up with leaves. The equipment shed is not by any trees, but I've noticed a lot of dead bugs, bird droppings and some dessicated vegetation collecting in the gutters.
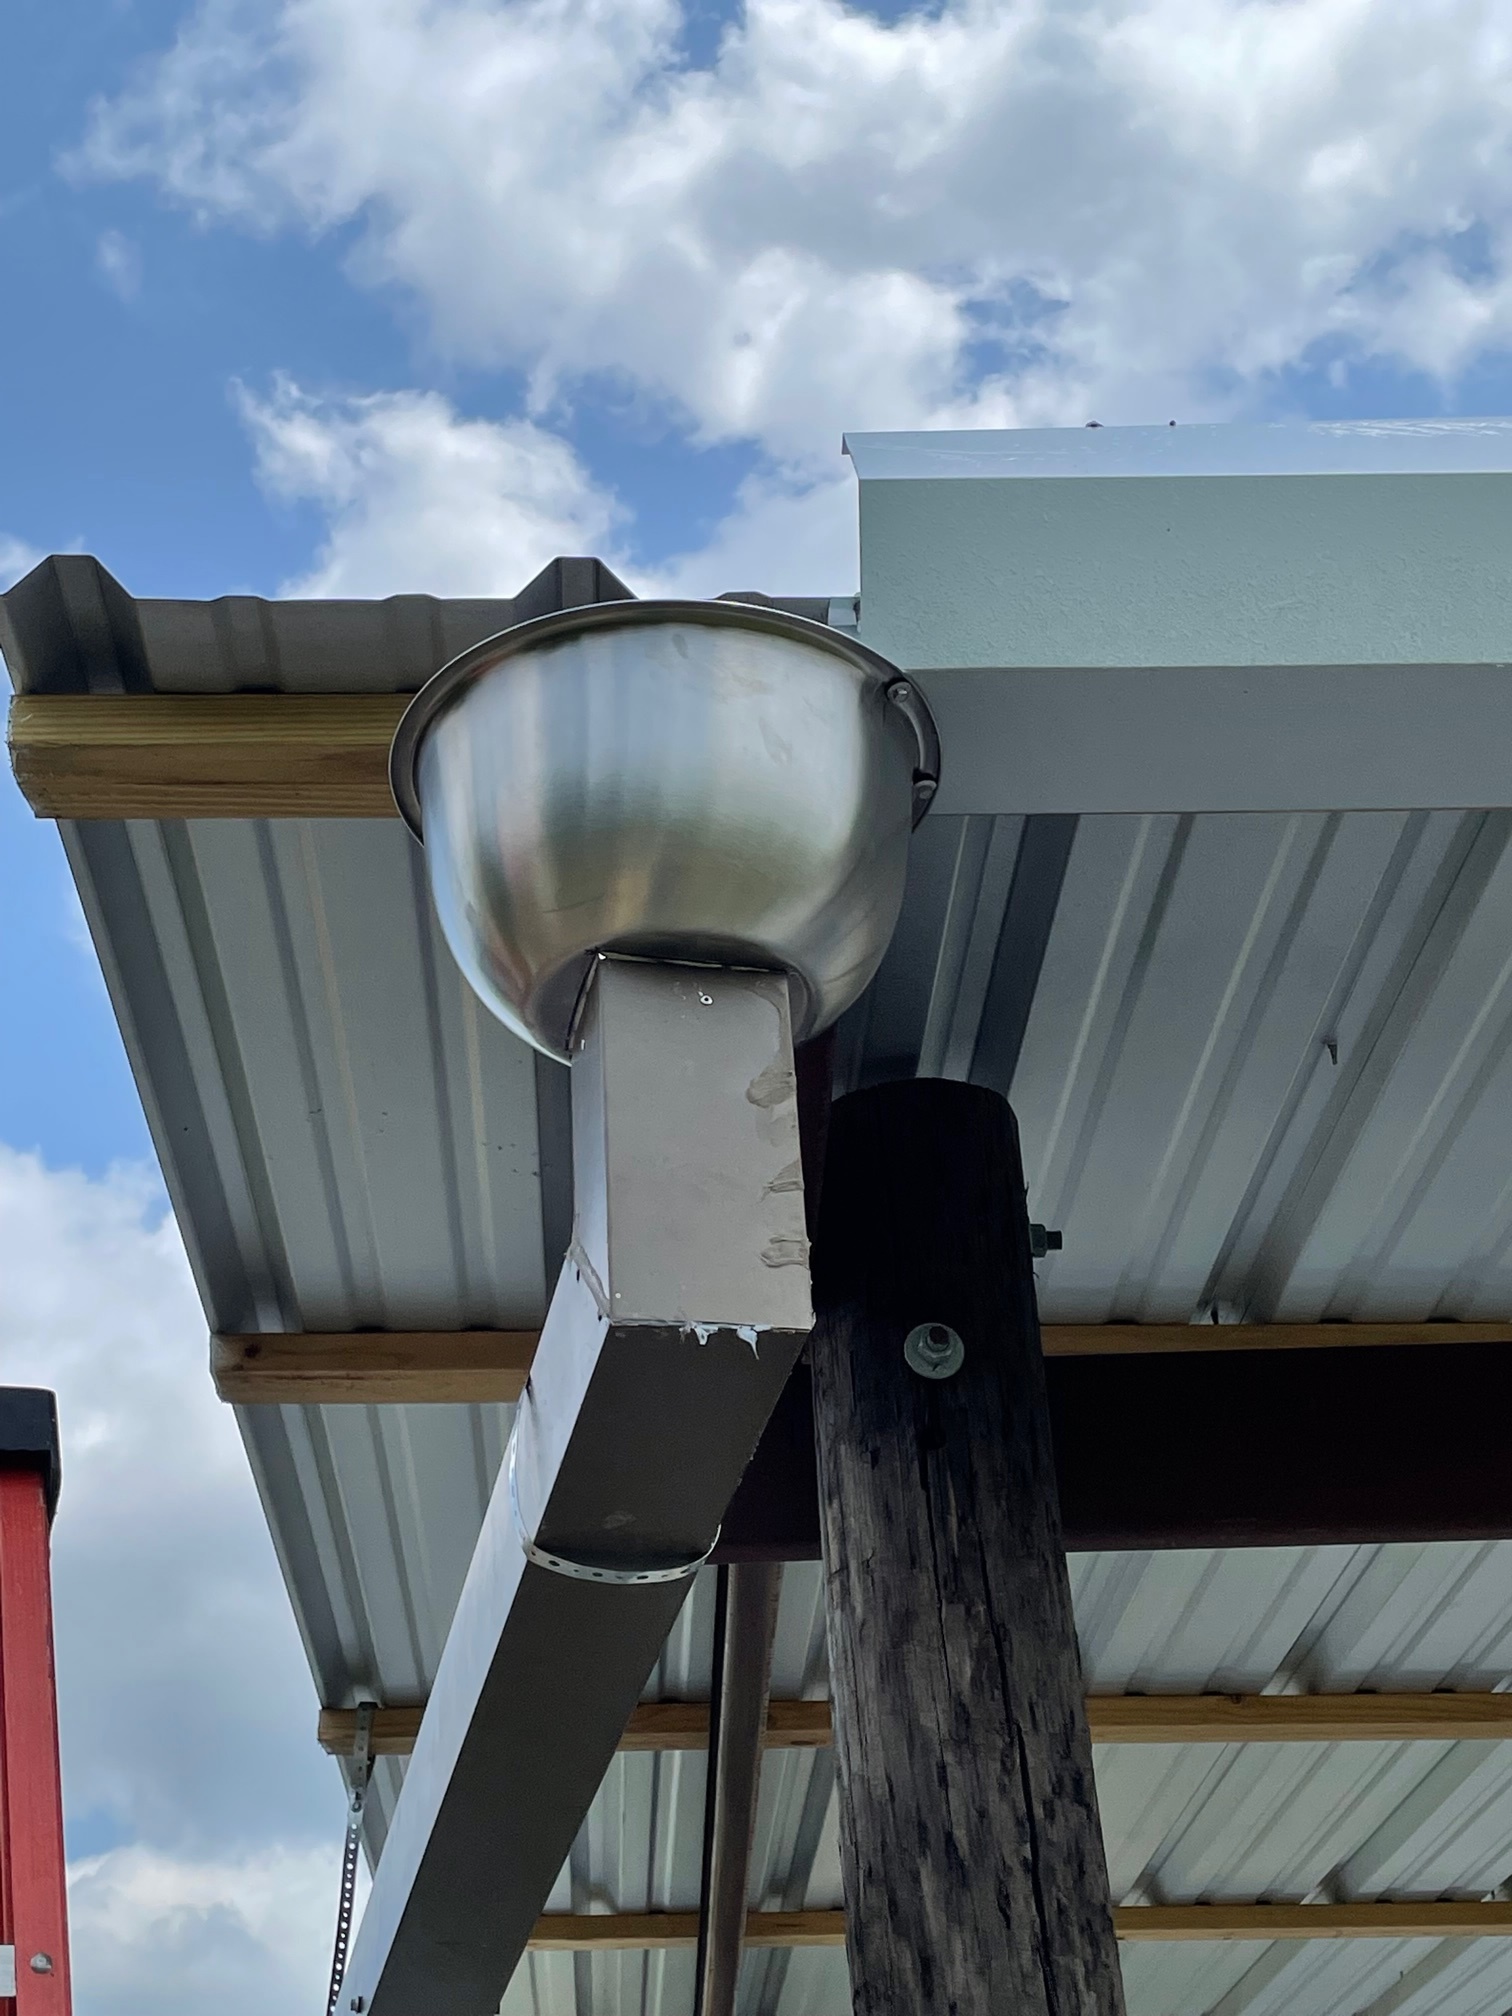
So I did not install one of the gutter end caps - I want water to freely flow in the direction of the tanks and minimize the chance of rain water going over the top of the gutter. I bought a large stainless salad bowl at WalMart and fit it to a 4 inch square downspout. Two screws secure the bowl to the end of the gutter.
Then I ran the downspout to the first tank top port. The pipe is suspended from the roof perlins using plumbers hanging tape.
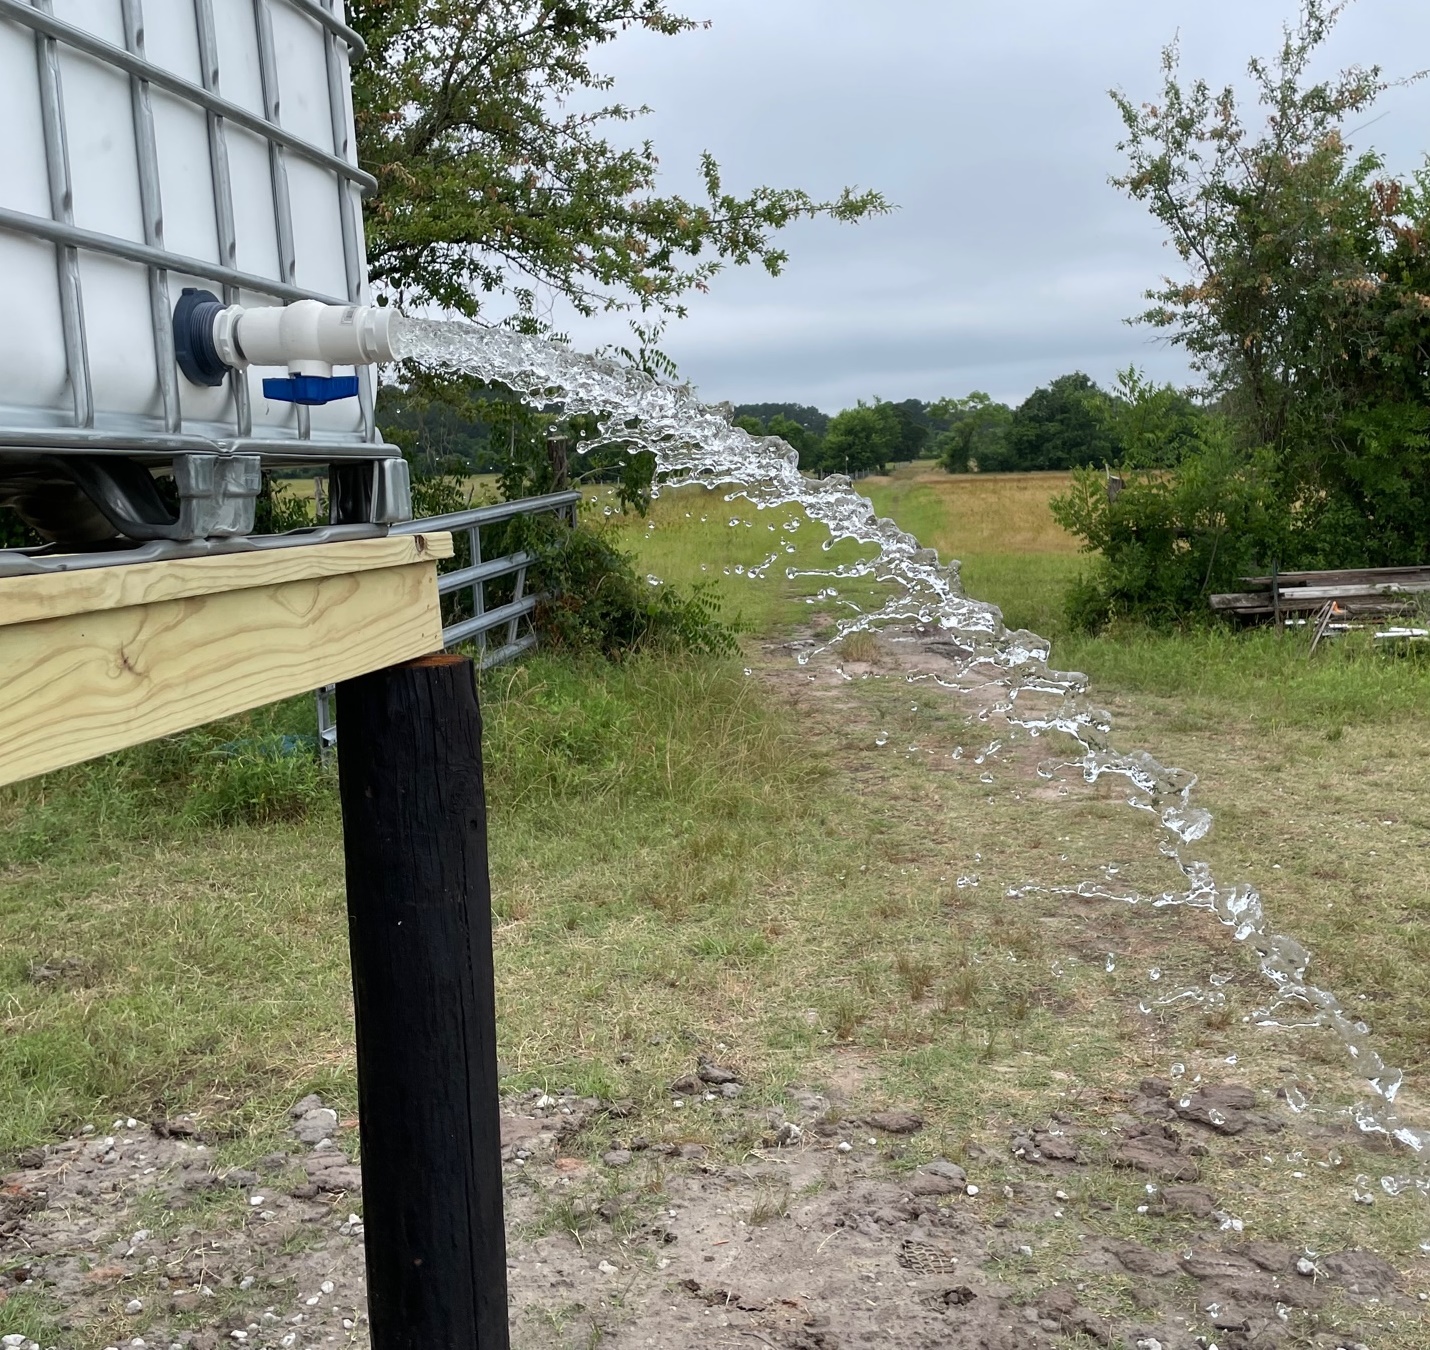
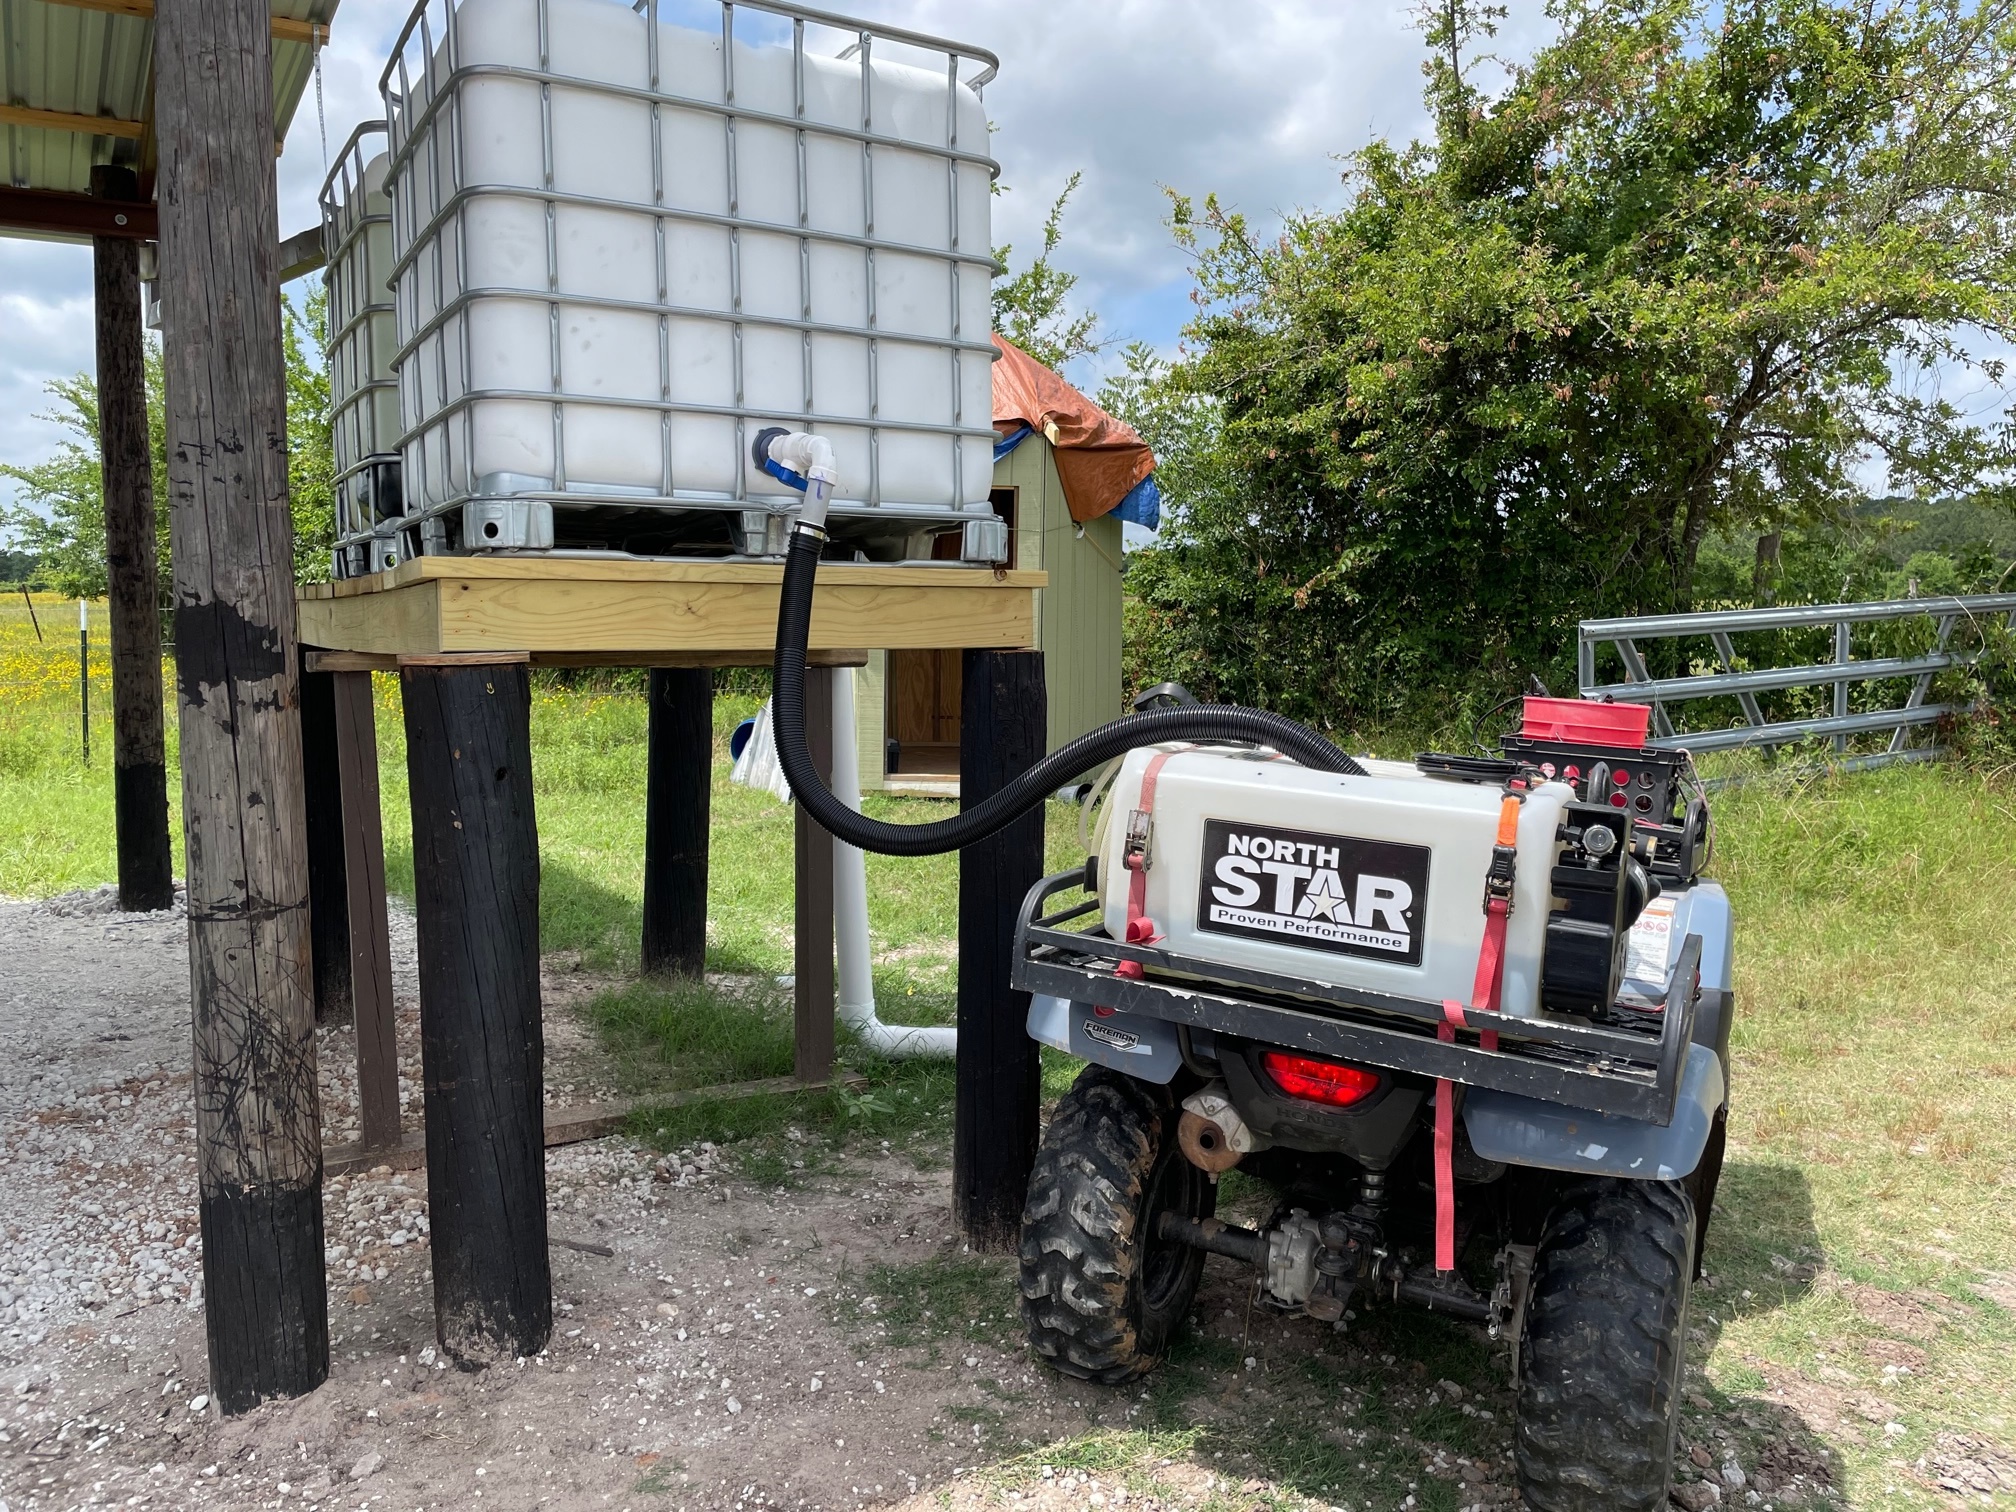
In Operation
Here the system is being used - filling the water tank on my ATV. Plenty high enough to get my ATV under. I installed a hose from a vacuum cleaner on the tank outlet, so I don't have to get right under the valve.The system works amazingly well. We got .15 inches of rain and it refilled the system with about 30 gallons of water. It only takes about 10 seconds to fill that 30 gallon tank on my ATV with clean water. This is so much better than dealing with 5 gallon buckets of water from the pond!
Contact: Joe Anders, jlanders@hotmail.com